
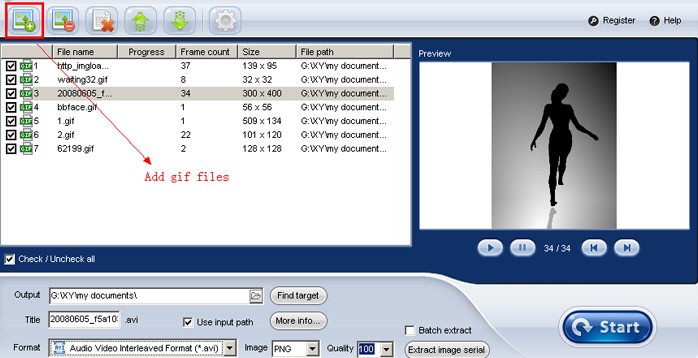
Step 1 Add gif files
After launching the program, you will see the window below. Add gif files(or bmp, png, jpeg files) you want to convert.
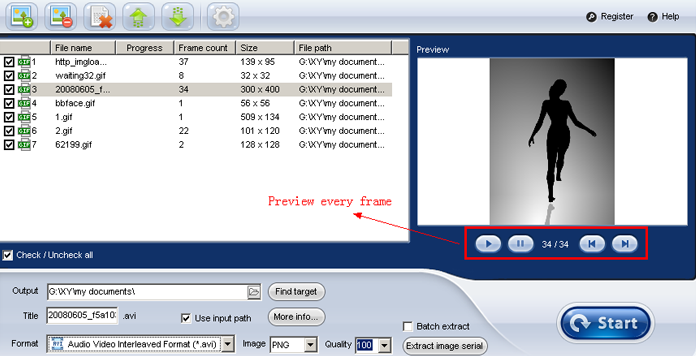
Step 2 Preview gif file frame by frame
You can play the gif file you selected, and also preview frame by frame.
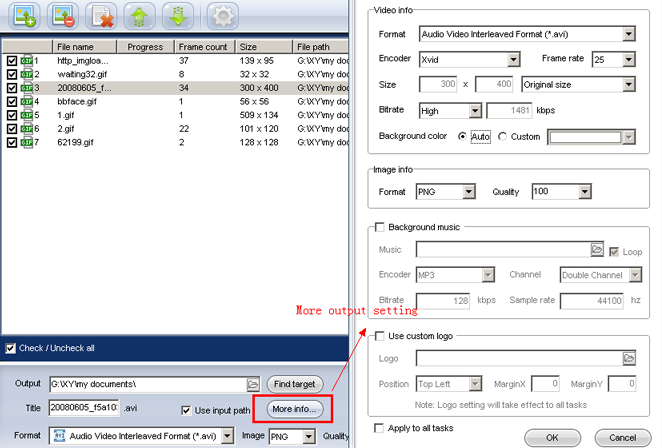
Step 3 Output setting
Click "More info..." to get more output setting, include video encoder, frame rate, bitrate, size, background color, background music, custom logo, etc.
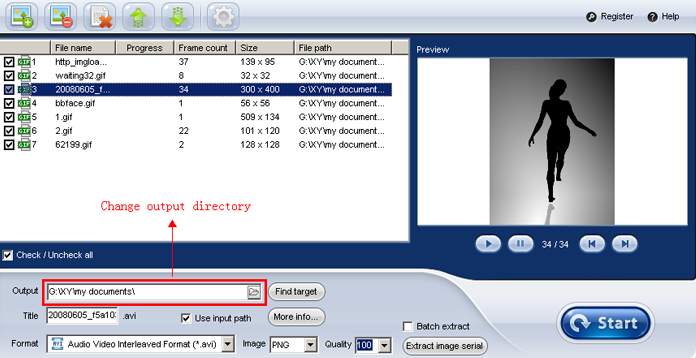
Step 4 Change output directory
As default, the output video files will save to the same directory of the original gif files. You can change to a specified directory.
Step 5 Convert to video files & Extract image serial
Choose a video format for the output, and then click gif to video conversion: EXE If parameter [Destination file] is missing, the output file will keep the original name and save to default directory which can config in software's option.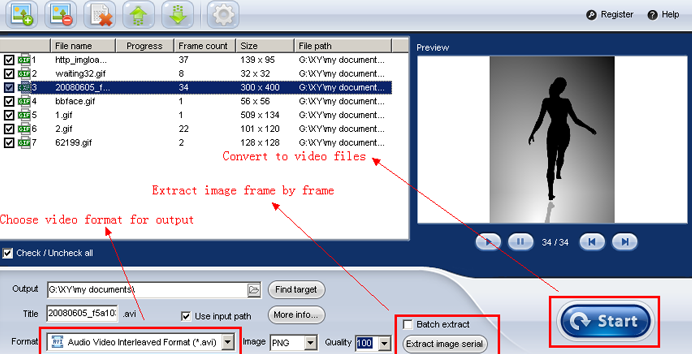
Command line conversion
Example 1:
"C:\Program Files\ThunderSoft\GIF to Video Converter\Gif2Video.exe" "C:\test.gif"
Example 2:
"C:\Program Files\ThunderSoft\GIF to Video Converter\Gif2Video.exe" "C:\test.gif" "C:\dest.avi"
gif image serial extraction:
EXE
If parameter [Destination directory] is missing, the output file will save to default directory which can config in software's option.
Parameter
Example 1:
"C:\Program Files\ThunderSoft\GIF to Video Converter\Gif2Video.exe" "C:\test.gif" PNG
Example 2:
"C:\Program Files\ThunderSoft\GIF to Video Converter\Gif2Video.exe" "C:\test.gif" "C:\" JPEG 95